
TL;DR
Moving your rig into a closet can drastically reduce noise and improve sound quality, but it requires strategic placement, sealing gaps, and proper ventilation. Foam alone isn’t enough—focus on sound leaks, reflection points, and airflow for best results.
Imagine turning a tiny, cramped closet into your personal recording studio. Sounds impossible? Not quite. The secret lies not just in buying foam panels, but in understanding how sound moves around and through your space. When you know where to place your gear and how to block escape routes, your closet transforms into a surprisingly professional-sounding setup.
This guide cuts through the noise—literally. You’ll learn why placement, sealing gaps, and proper airflow matter more than fancy foam. Plus, practical tips for making your closet work without turning it into a hot, cramped mess. Ready to make your closet your best studio yet? Let’s go.
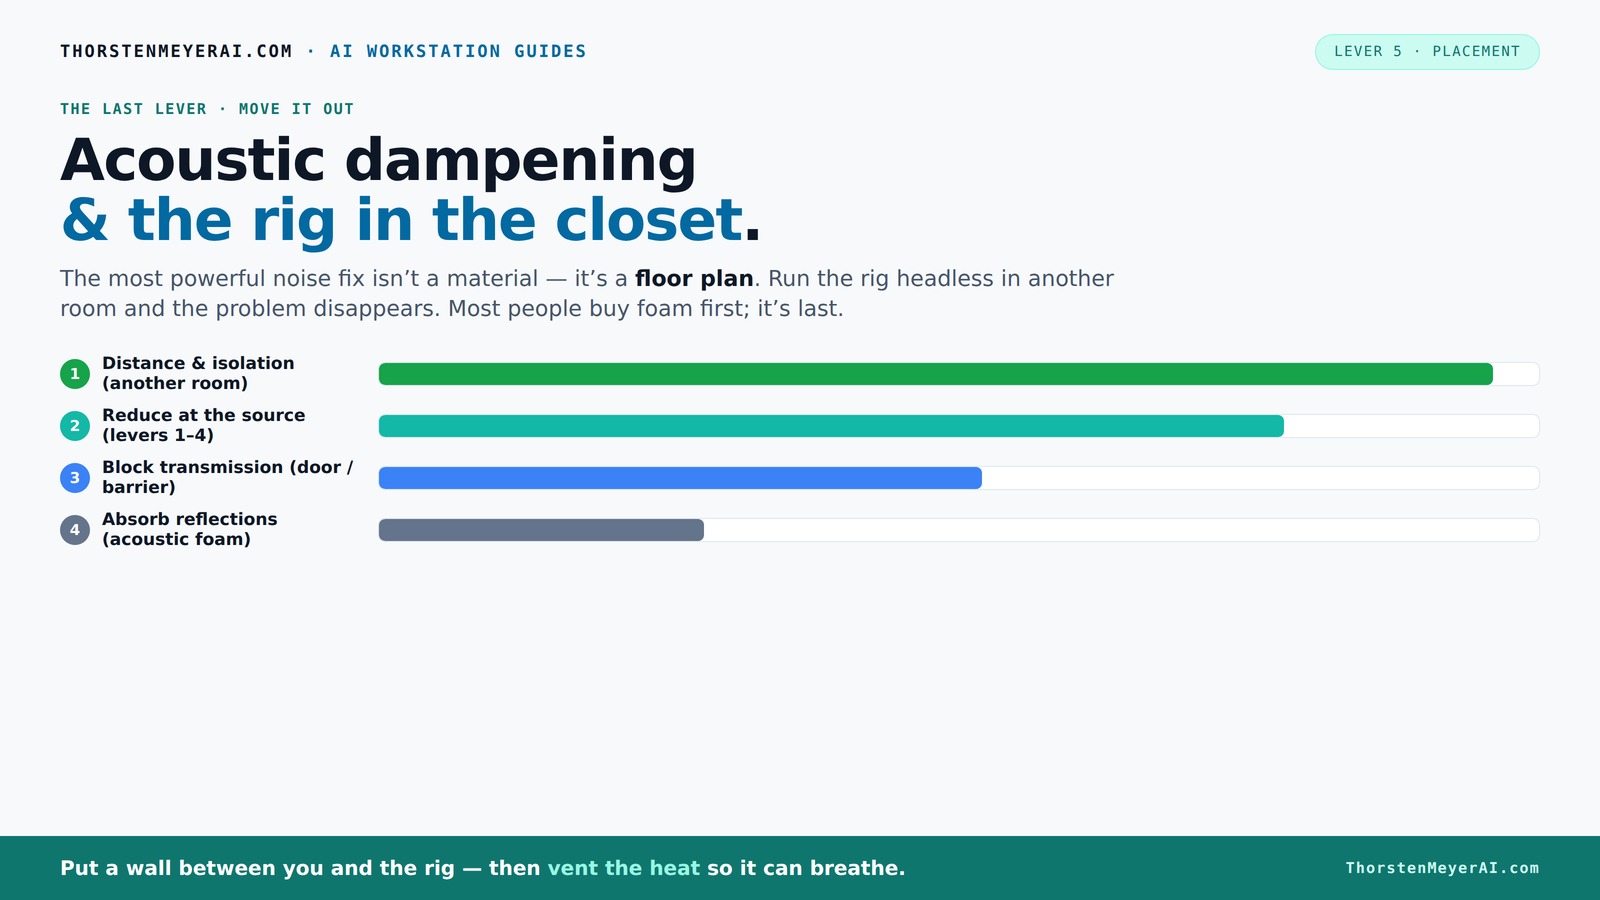
Acoustic dampening
& the rig in the closet.
The most powerful noise fix isn’t a material — it’s a floor plan. A rig you can’t hear because it’s in another room beats any amount of foam. Tap the approaches in Part 1 to see what actually works.
(another room)
(levers 1–4)
(door / barrier)
(acoustic foam)
Contain the noise, not the heat
Key Takeaways
- Sealing gaps around doors and outlets drastically reduces sound leaks—up to 70% or more.
- Placement of acoustic panels at reflection points is more effective than scattering foam randomly.
- Ventilation is critical—use passive vents or quiet exhaust fans to prevent overheating and improve airflow.
- A closet can be a surprisingly good studio with proper treatment, but it’s not full soundproofing—external noise will still leak if gaps aren’t sealed.
- Prioritize structural fixes and sealing first. Foam and soft treatments are helpful but secondary.
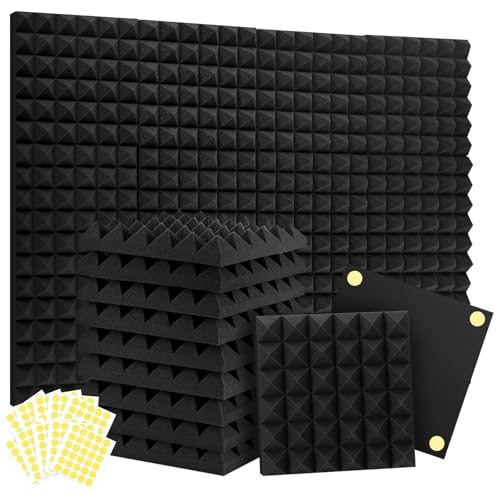
Focusound Acoustic Panels 24 Pack 2"x12"x12" with 120 PCS Double-Side Adhesive - Sound Proof Pyramid Foam for Walls, Home Studio Noise Absorption & Echo Control Kit
STRESS-FREE INSTALL: NO HOLES, NO RESIDUE! - Install & Remove Stress-Free with 120 reusable adhesive squares – cleans...
As an affiliate, we earn on qualifying purchases.
As an affiliate, we earn on qualifying purchases.
Why a Closet Can Be a Game-Changer for Your Sound
A closet isn’t just a cramped space cluttered with clothes. It’s a surprisingly effective little sound chamber—if you treat it right. Moving your rig into a closet cuts down on external noise and reflection, making your recordings clearer and less echoey.
For example, a voiceover artist in New York turned her tiny closet into a vocal booth. She added some foam, sealed gaps, and placed her mic carefully. The result? A clean, focused sound that rivaled a professional studio—without the high price tag.
But the key isn’t just stuffing the closet with foam. It’s understanding how sound behaves and controlling it at the source and along its escape routes. For instance, sound reflects off hard surfaces, creating echo and muddiness. Proper placement of absorptive materials at reflection points can drastically improve clarity. You can learn more about acoustic dampening, placement, and the 'Rig in the Closet' setup to optimize your space. Sealing gaps prevents sound from leaking out, which not only improves privacy but also enhances the overall sound quality inside your space. For detailed tips, see this guide on acoustic treatment. The tradeoff is that over-treating can deaden the sound too much, making it sound dull or unnatural. Finding the right balance is essential for a natural, clear tone.

Focusound 52 Pack Acoustic Foam Panels 1" x 12" x 12" Sound Proof Foam Panles Soundproofing Noise Cancelling Wedge Panels for Home Office Recoding Studio with 300PCS Double-Side Adhesive
Soundproofing - Acoustic foam panels triangular grooves structure for better noise absorption, helps to reduce and absorb unwanted...
As an affiliate, we earn on qualifying purchases.
As an affiliate, we earn on qualifying purchases.
Acoustic Dampening vs. Soundproofing: What’s Really Going On?
Acoustic dampening and soundproofing aren’t the same thing—yet many confuse them. Dampening is about reducing echoes and reflections inside the space. Think of it as softening the room’s sound qualities—adding foam, rugs, or blankets to absorb echoes. This makes your recordings sound clearer and more professional because it minimizes internal reverberation that can muddy your audio.
Soundproofing, on the other hand, stops sound from escaping. It involves sealing gaps, adding mass, and constructing barriers—like extra drywall or soundproof doors. This prevents external noise from entering and your sound from leaking out, which is especially important if you’re recording in a noisy environment or need privacy.
For example, a podcaster might use foam panels to tame inside echo but still hear muffled noise leaking through the door. To truly block sound, he’d need a heavy door seal and perhaps a barrier on the walls. The tradeoff is that soundproofing can be costly and may require structural modifications, while dampening is often more straightforward and affordable. Ideally, a balanced approach combines both: dampen reflections inside while sealing leaks to contain noise. Understanding these distinctions helps you prioritize your efforts and allocate your budget effectively, ensuring you don’t over-invest in one area while neglecting the other.

118” Wedge-Shape Foam Window Weather Stripping Door Seal Strip,Soundproofing Frame Winter Insulation Tape for Exterior Front Door,Noise Cancelling Window Inserts,Door Gap Filler Light Blocker,White
Upgraded Wedge Design: This window draft stopper features an upgraded wedge design, tapering from 5/32" to 11/32" (0.16"–0.35")...
As an affiliate, we earn on qualifying purchases.
As an affiliate, we earn on qualifying purchases.
Where to Place Acoustic Panels for Maximum Effect
Positioning your acoustic treatment is everything. Start with the reflection points—these are the spots where sound bounces directly into your mic, causing echo and coloration that can distort your recordings. Proper placement of panels at these points drastically improves clarity.
For vocal work, place panels at the side and behind the mic, especially at the first reflection points. Use a mirror trick: hold a mirror flat against the wall behind you and mark where sound hits. These spots are critical because they are where sound reflects toward your microphone, creating unwanted room tone.
In a closet setup, a simple foam panel behind the mic and a few on the side walls can cut echo by half. Covering 20-30% of the wall surface with absorptive material is usually enough to significantly improve sound quality without over-treating, which can deaden the natural tone. Additionally, don’t overlook the door—cover it with a blanket or foam if it’s thin or has gaps, as every leak or reflection point can impact your recordings. Strategic placement ensures you maximize your limited treatments, making your modest setup sound much more professional.

VIVOSUN 6 Inch Inline Duct Fan 240 CFM, HVAC Exhaust Ventilation Fan with Low Noise for Basements, Bathrooms, Kitchens and Attics, Silver
Durable & Powerful: Constructed from reinforced and corrosion-resistant metals for long-lasting reliability; The fan has a strong motor...
As an affiliate, we earn on qualifying purchases.
As an affiliate, we earn on qualifying purchases.
How to Seal Gaps & Block Sound Leaks Effectively
Sound leaks out through cracks, outlets, and unsealed gaps—biggest weak spots in a closet studio. Sealing these is quick and cheap but makes a huge difference in both privacy and sound quality. For more insights, visit this resource on sealing gaps. Use weatherstripping around the door, acoustic sealant on outlets, and draft stoppers. These actions prevent sound from sneaking out and external noise from entering, which is critical for maintaining a controlled environment.
For example, sealing the closet door with a moving blanket or a dedicated door seal reduces sound escape by over 70%. Covering outlets with foam gaskets or outlet covers also helps prevent sound leaks through small openings. The tradeoff is that neglecting these gaps can undermine your entire setup, allowing external noise in and internal sound out, defeating your efforts at sound treatment. Prioritizing sealing these weak spots ensures your acoustic efforts are effective, creating a more isolated and controlled recording environment. It’s about understanding that even small gaps can significantly compromise your sound quality.
The Critical Role of Ventilation and Airflow in a Closet Rig
Putting a hot, busy rig in a tiny closet can turn into a meltdown—literally. Good airflow is non-negotiable. Learn more about ventilation strategies for small spaces to keep your rig cool. Without proper ventilation, heat builds up quickly, causing your equipment to overheat, fans to ramp up, and noise levels to spike. The tradeoff is that many ventilation solutions can introduce noise, so choosing quiet methods is essential.
Passive vents, small exhaust fans, or ducted airflow systems can help maintain a safe temperature without sacrificing quietness. For example, a quiet 120mm fan exhausts heat while keeping noise levels below 30 dB—barely audible outside the closet. Proper airflow not only prevents overheating but also reduces the chance of thermal shutdowns, which can cause your system to behave erratically and produce unwanted noise. In a practical scenario, a closet with a small vent cut the temperature by 15°F in an hour, preventing throttling and ensuring stable operation. Without airflow, your rig overheats, fans roar louder, and the overall environment becomes less suitable for recording. The tradeoff is balancing cooling with noise control, which can be achieved with smart vent placement and quiet fans. Check out [this guide](https://thorstenmeyerai.com/reduce-heat-noise-ai-workstation/) for detailed airflow solutions and how to balance noise and cooling effectively.
Putting It All Together: The Perfect Closet Setup Checklist
Ready to build your ideal closet rig? Here’s a quick checklist.
- Seal all gaps around the door, outlets, and vents.
- Place acoustic panels at reflection points—behind your mic and on side walls.
- Add a blanket or foam barrier over the door.
- Use rubber feet or grommets to decouple the rig from the surface.
- Ensure proper ventilation—passive vents, ducted airflow, or exhaust fans.
- Keep the space organized—cables routed neatly, enough clearance for airflow.
For more advanced soundproofing, consider adding a second drywall layer with damping compound like Green Glue. But start simple, and test as you go.
Common Pitfalls & Mistakes to Avoid
Many fall into the trap of over-treating or under-sealing. Foam alone won’t stop sound leaks, and sealing gaps alone won’t improve sound quality inside the room.
Another mistake is blocking airflow—no matter how quiet your rig, overheating ruins everything. Don’t forget ventilation. Also, don’t rely solely on soft materials; structural fixes like sealing gaps and decoupling matter more.
For example, a beginner added thick foam panels but left the door gaps wide open. Result? Still noisy and hot. Fixing that small detail made a world of difference.
Understanding the Limits of a Closet Rig
A closet setup isn’t a magic bullet. It works great for voice, podcasting, and some instruments, but it’s not soundproofing perfection. Footsteps, impact noise, and external sounds still sneak in if you don’t seal everything well.
Plus, heat buildup is real. Without proper airflow, your rig can overheat and throttle, making noise worse. It’s a balancing act: treat reflections, seal leaks, and ventilate.
For instance, a musician found that adding bass traps helped with low-end muddiness, but external street noise still entered through the thin door. Know your limits, and don’t expect total soundproofing—just better sound quality.
Frequently Asked Questions
Can a closet really be soundproofed?
A closet can be significantly soundproofed with sealing, insulation, and structural fixes, but complete soundproofing is challenging. It’s more about reducing leaks than total isolation. Expect external noise to still be audible if gaps or thin walls remain.What is the difference between acoustic dampening and soundproofing?
Acoustic dampening reduces echo and reflections inside the space, making recordings clearer. Soundproofing blocks sound from leaving or entering the space, requiring sealing, mass, and barriers. Both are necessary for a balanced setup.Where should I place the microphone in a closet booth?
Position the mic at the reflection point—usually about 6-12 inches away from the wall behind you. Use a reflection filter if possible, and avoid placing it near reflective surfaces like the closet door or clothes. Proper placement minimizes room tone.Should I add bass traps in a closet?
If you notice low-end muddiness or standing waves, bass traps can help. Use 2-inch thick traps in corners or at reflection points. For voice recording, often soft panels suffice, but bass traps improve overall clarity if space allows.Is foam better than blankets or panels?
Foam is designed specifically for acoustic treatment and works best at high frequencies. Blankets and quilts help reduce reflections but don’t absorb as evenly. For best results, combine foam with soft materials and sealing for noise leaks.Conclusion
Turning a closet into a quiet studio is about smart placement, sealing, and airflow—not just slapping on foam. When you control where the sound escapes and how it’s reflected, you get clear recordings without breaking the bank.
Think of your closet as a mini fortress—tight, sealed, and well-ventilated. That’s the secret to a space that’s both quiet and cool. Now, go build your perfect closet setup—your voice deserves it.